Friday, January 24, 2014

Mastering the art of French Macarons


About a year ago, my friend Kim and I got into a discussion at work about baking.  Kim is an absolutely fabulous baker and from time to time will share with us the fruits of her labors. Everything from home-made marshmallows to chocolate dipped coconut macaroons! I have never even been slightly disappointed in any of her wonderful treats! She is my go-to for baking questions and she is even the one who taught me to make cake pops. During our discussion, the topic came up of the illustrious French Macaron.  Neither of us had ever attempted them before but both thought they were so lovely and decided we needed to take the plunge and give them a whirl. After ordering a couple of cookbooks, and a year later, we finally set a date! Summoning our innermost Julia Child, and armed with tips and recipes, we dove in!

For those of you perhaps not familiar with French Macarons, they are virtually nothing like their distant cousin the coconut macaroon.  French Macarons (use your best french accent on that pronunciation) are a much more fickle beast made with Almond flour, egg whites (where the fickle part comes in) and confectioners sugar. My very first tip for ease in macaron making is to buy Almond flour!! We started with almonds and ground them our self, since almond flour was MIA in the grocery store. Its a lengthy process of blending and sifting and sifting some more, all the while trying NOT to accidentally make Almond butter. So do yourself a favor, and just hunt down some almond flour!


(See how much fun it is sifting home made almond flour...)


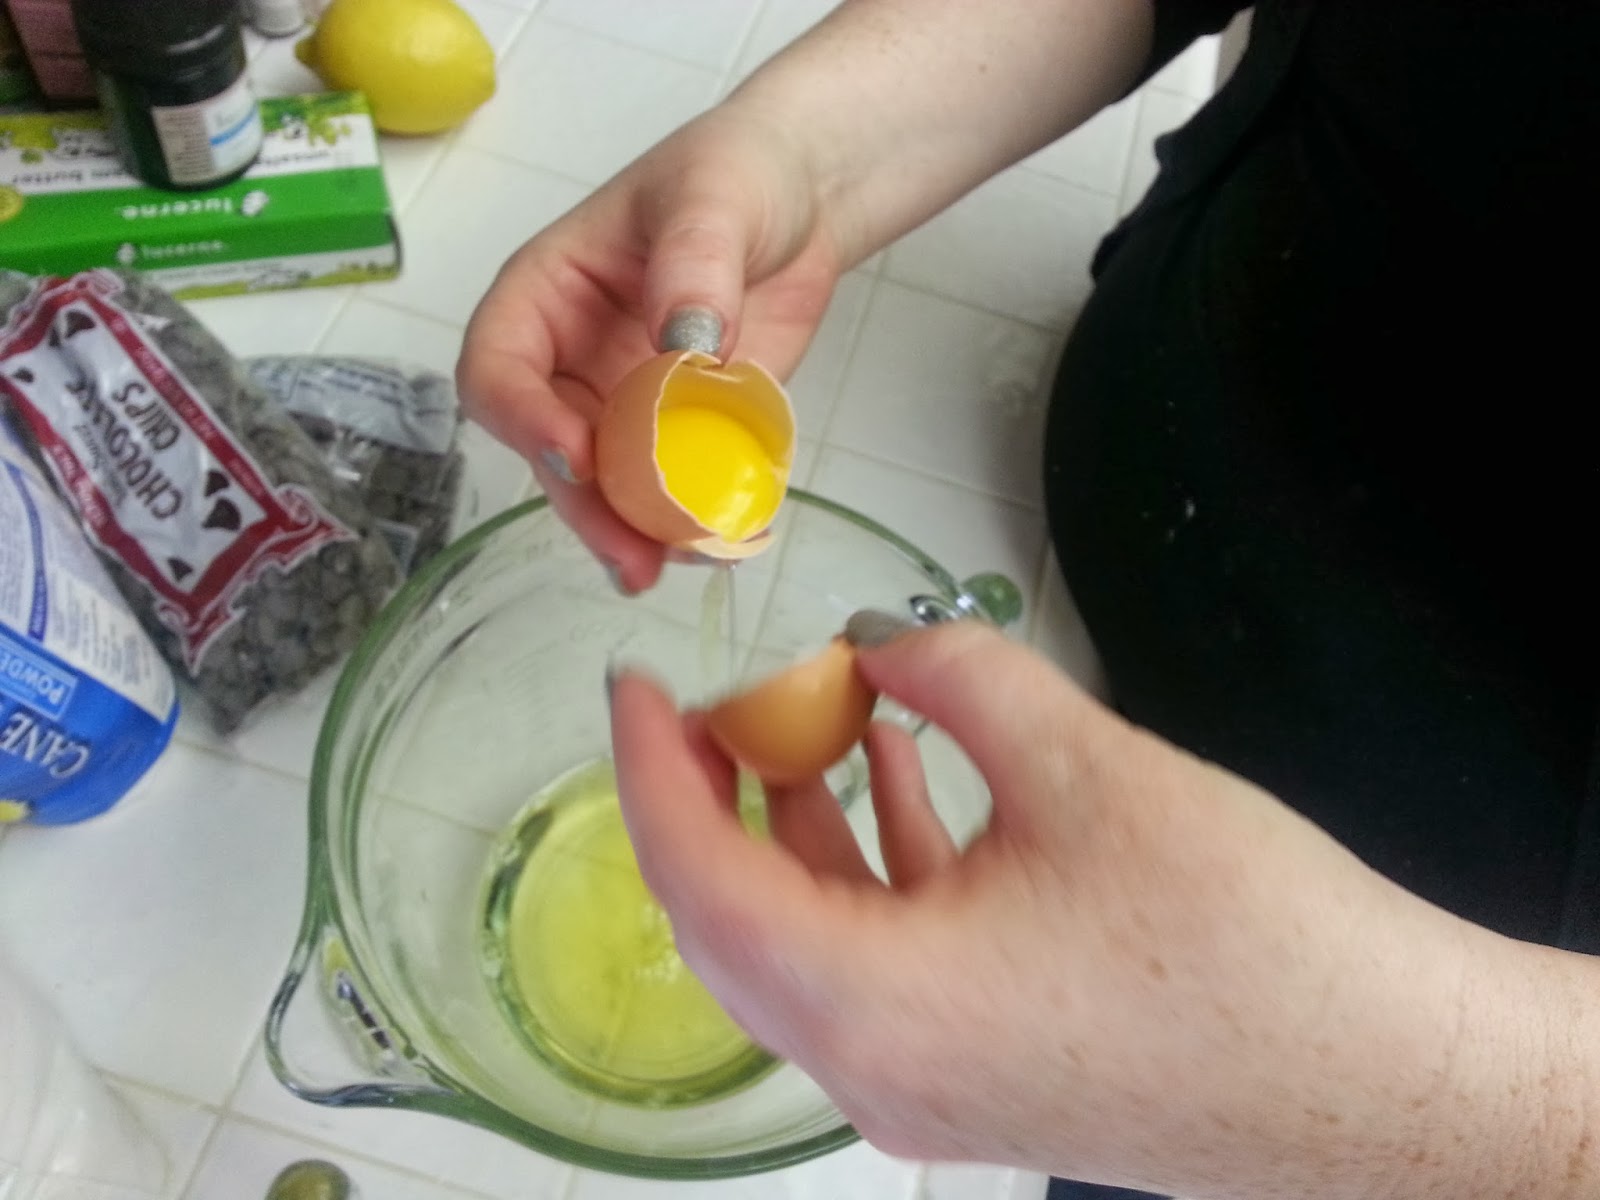
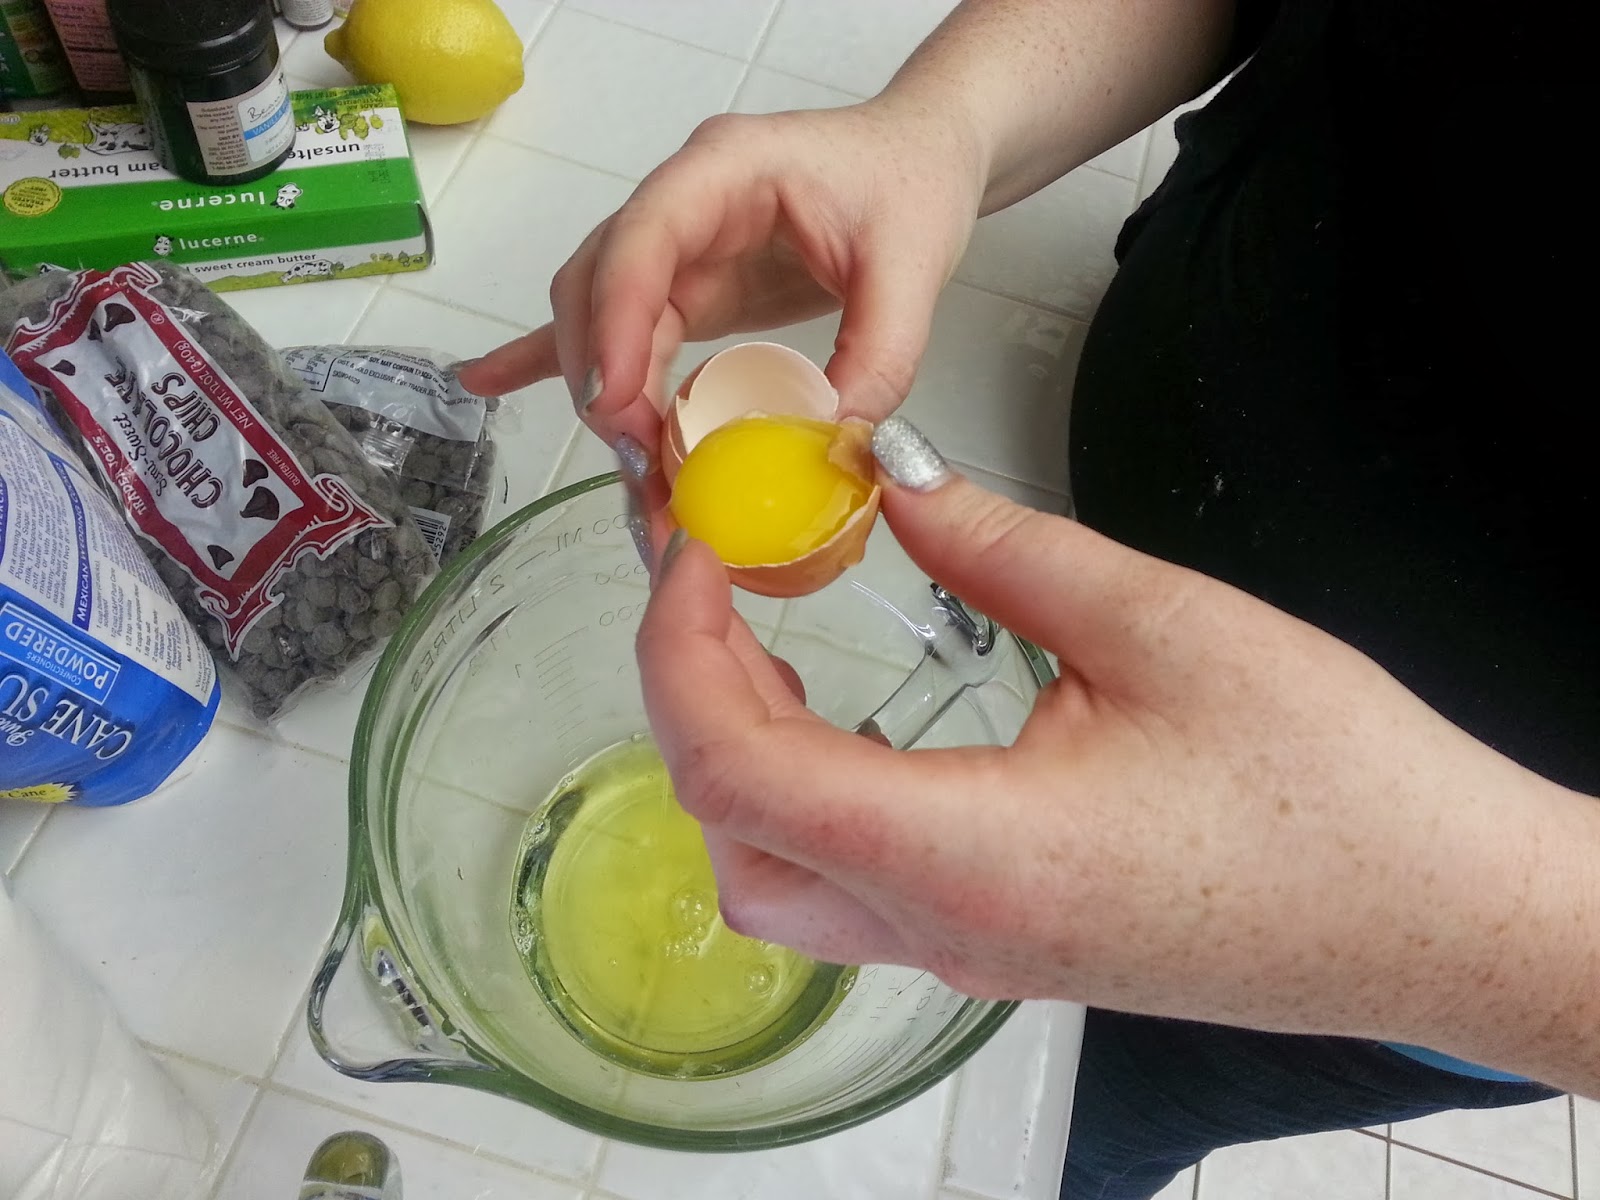
After grinding and sifting our Almond flour, we mixed in the confectioners sugar and then  sifted it all again. Then, setting that aside, we began prepping the eggs.  Kim taught me a wonderful trick to getting room temperature eggs (very important in Macaron making) Carefully submerge your eggs in very warm water for five minutes and they are ready to go. Brilliant! Kim also helped me separate (successfully) my first egg without using an actual separator!


Next, we whipped the eggs into stiff peaks (adding food coloring if desired)


Then, we carefully folded in the almond flour/sugar mixture.
 
 
Once fully integrated, we filled a pipping bag with the mixture and pipped 1-inch rounds onto a silpat lined cookie sheet. (Eventually we found that parchment paper works WAY better)


We thought at this point, that something might be wrong, as our circles were very puffy and didn't seem to "settle" and look like the pictures in the recipe book. But, having never made them before, we pressed on.  Our recipe told us to set them out for an hour to let a "crust" form before baking so that classic "feet" ("feet" are the sort of fluffy base that are indicative of the perfect french macaron) would form when they baked.  Once they were done forming their "crusts", we baked them.....they did not get feet.  :(
 

While these were baking, we made the most divine french butter cream, for the fillings, using the egg yolks we had discarded earlier. We made a simple syrup and then blended that into the whipped egg yolks and added our desired flavorings.


Our first attempt, did not exactly look like text book French Macarons....


Although, there were no problems in the flavor department. Our Chocolate Macaron with chocolate ganache filling was fantastic! Our Orange-Vanilla Macaron was quite pleasant and our Lemon-Lavender ones were so DIVINE they gave us chills....SERIOUSLY! None the less, we went home slightly disappointed in our macarons with less than amazing curb appeal.....
 
Later that evening, I got a text from Kim saying that she had found a YouTube video for "Foolproof Macarons" and had followed her advice/recipe and....VOILA! Bravo Kim!!


I was soooooooo excited!!! I was determined to try them myself again as well and myself some perfect Macarons as well. The next day, I watched the video and got started.  My first batch following her tips was not perfect, but I could see the beginings of feet and I had enough almond flour left for two more batches.


This lady's best tip was that when mixing the almond flour into your stiffened egg whites, fold them in until your mixture is a "molten" consistency (watch the video for a great visual measure) and it drips off your spatula as you would expect molten lava to flow.  I thought I had possibly over-folded the last batch so I was very careful on the next batch.  Once it had gotten to the molten consistency, I pipped my circles and waited her recommended 30 minutes.


After the 30 minutes was up, I popped them in the oven and waited with baited breath...I was almost afraid to check on them, but was elated when halfway through their bake time, THEY HAD FEET!!!
 
 
I was so excited that I didn't even care that a few of them had cracked on the top. They had feet and were mostly smooth, so I was thrilled! I went ahead and made the third batch and they turned out pretty good as well.


For those of you still reading (sorry, Mastering French Macarons took a while) I have come away from this adventure with a few thoughts....
#1-Macarons are finicky as heck so just go in with a "practice makes perfect" mentality.
#2-I really DO think that ANYONE can perfect these really classy cookies.
#3- Watch the YouTube link prior to making these! The video is SUPER helpful and her tips really do work!
And finally #4- Get almond flour! It's worth it!
 
Kim and I really did have a blast making these and having 2 baking brains working out the kinks together and separately really did help. Bottom line, these really are yummy and fancy little treats and I hope you will give them a try. The possibilities with colors and flavors really are endless and I can't wait to make more! And in closing, borrowing the sign off of my inspiration during this project.....BON APETITE!

Saturday, January 18, 2014

Just like Mommy's!

It was Christmas in January for part of my family this week. We like to keep the holiday going as long as possible....Haha just kidding! Between people passing around the flu/colds during actual Christmas and trying to coordinate 3 people's work schedules with Doctor's appointments etc, we finally found a day that worked. I am sure my nieces did not mind another Christmas one bit from the looks on their faces as people showed up with bags filled with presents.

While planning for this years gifts, I thought I would try out a sort of prototype for an item I had been considering making for my Etsy shop.  My brother and sister-in-law love customized their mesh tote bag and use it as their "diaper bag" for their toddlers.


The thought occurred to me that my nieces might enjoy a tote bag as well, but perhaps one that was more size appropriate.  Thus began my scheming....

I took my regular sized tote bag pattern and brought all the measurements down a few inches.  I wanted it to still be big enough that they could carry toys or books in them, but not so big that it would be super hard to carry.  Once I was satisfied with my measurements, I set out to find the perfect fabrics. For Eva, I found these super cute coordinating Minnie Mouse fabrics!


Eva has been a Minnie Mouse fan from a very young age and I thought she would really like these on her very own bag.  For Audrey, I decided to make use of some adorable Riley Blake fabric I purchased from a fellow Etsy shop during a sale a while back.


I had no idea ,at the time I purchased it, what I would use it for. It was just so darn cute! I couldn't resist, and I was pretty confident that Audrey would enjoy a princess bag.


Our Christmas in January was quite a big day for my brother's family.  Their family dog had broken his leg the day before and the no one, I'm sure, got very much sleep the day before. Audrey fell asleep and had an inpromptu nap while we waited for some of the family to arrive.  Eva, therefore, got her own personal audience while she opened her presents.  She was all to eager to model her "Just my size" tote bag for the room.


She seemed pretty excited too when she told her Mom "I can fit my lunch in here!" Equally exciting was when she realized she could probably fit her Veterinarian doll set ,from my boyfriend, inside the bag!


My poor boyfriend got the wonderful privilege of opening up said doll set for her. MAN! That thing was packed more securely than Barbie dolls! I'm surprised he didn't have to bust out the pocket knife like my Dad used to have to with all the sewn on plastic and twist ties on those things! None the less, I think he was pretty happy she enjoyed the gift. 
 
Audrey finally awoke from her nap shortly after Eva was done with her unwrapping, only for Eva to fall asleep herself.  So Audrey got her own, somewhat groggy, Christmas present opening session.  She seemed somewhat interested in her tote bag and sleepily let me take just this one picture of her modelling her bag while still barely keeping the sleep from her sweet little eyes on Daddy's lap.


She was so cute and sweet opening all of her gifts and was sure to thank everyone after each gift. This kid has some amazing manners! All in all, it was a very nice Christmas.....even if it was in January. It was a little hard for me to tell, with all the sleepiness, if the "Just my size" tote bags had been a true hit or not.  That is until the next morning when my brother sent me these pictures....


Both of the girls had grabbed their totes for a trip to the park! I think they like them! Mission accomplished! 


Friday, January 10, 2014

B is for Banana bread


Bananas have always been among my very favorite of fruits.  However, I have always had a slight problem with them, in that they never seem to last long enough for my taste.  My ideal banana is one that has almost all of the green gone but just a little green still lingering.  To me, they taste the best at this point.  Not too sweet, and not too mushy.  I only generally buy bananas at the grocery store if they are fully green.  Even then, I swear they are yellow practically by the time I get home.  Once they get their first freckle, (nothing against freckles ha ha) I won't eat them.  I'm sure my Mom would tell you this strange preference of mine started as a child when I would devour practically the entire bushell before we got home.  I love my barely ripe bananas, what can I say?
 
That being said, I hate to see good food go to waste.  My Mom used this recipe to use up all her overripe bananas and it has been a favorite of mine my entire life.  I almost don't get upset when my bananas go "bad" because I can just wait a bit and they will be ready for this scrumptious recipe!
 
 
Ingredients
 
1/2 cup softened butter
1 1/2 cups sugar
2 eggs
3 large ripe bananas
1/3 cup "sour milk"- (1/3 cup milk mixed w/ 1tsp vinegar)
1tsp baking soda
1tsp vanilla
2 cups flour
1/2 tsp salt
1 tsp baking powder
 
 
To begin with, mix together your softened butter and your sugar in a mixer until fluffy.


Add your eggs one at a time and beat well.
 
 
In a separate mixing bowl, mash your 3 ripe bananas


In a small cup, mix together your "sour milk" and stir that mixture into your mushed bananas.
 
 
Add your mushed banana mixture into your sugar/butter mixture and begin adding the remainder of dry ingredients one at a time until fully mixed.


Grease a bread pan and pour your mixture into it.


Bake for 1 hour at 350 degrees. Place on a cooling rack after baking time is done and enjoy!


This bread is fantastic anytime! Its especially great warm with a little butter on it but is really quite good hot, cold or otherwise. I hope you enjoy one of my favorite childhood treats! My favorite part is the crust, believe it or not. For whatever reason, the crust stays at this wonderful combination of slightly crunchy yet chewy and its sweet and fantastic! I think I will go enjoy another slice right now. Have a great weekend everyone!

Friday, January 3, 2014

2013-Gone in a snap!

Time flies when you're having fun and 2013 has been no exception for me.  This year has breezed right by and it has certainly been a year chalked full of memories and new adventures for me.  This year, I officially opened my very own Etsy shop.  It has been so much fun bringing my bags to life and working with my customers to create unique pieces they will love.  The joy I have found in my Etsy shop has led me to further explore my creative side with the creation of this blog.  Its only been a couple of months now, but it is such excellent motivation to actually push my way through my project list and finding new creative ventures. It has been a pleasure sharing my adventures and wanderings with you all and I look forward to many years to come. 

This New Years' day was sort of my "holiday recuperation day" as I like to call it.  The holidays always feel busy but this particular year seemed extremely busy and stressful for me.  Beings that I actually found myself off of work this year for the holiday, I decided to just relax! Not, however, wanting to be a complete loaf, (Although to be honest I did spend the entire day in pajamas and most of the day on the couch.)I found myself a quick project that I could actually do from the comforts of my living room and allow myself a small sense of accomplishment for the day.  For some time now I have been putting off this project and I'm not sure if I was feeling somewhat New years resolution-ey or what, but I decided it had been put procrastinated enough.

Some time ago (months at least) the zipper on my favorite duvet cover had broken.  I thought it a terrible waste to throw away something I loved so much and that was still perfectly functional in every other aspect.  I decided that I would fix it myself.  I had no idea where one might get a 60 inch zipper and even if I did, zippers are not my favorite thing to work with in general, much less trying to replace a zipper into an already sewn item. I weighed the other options including sewing on ribbon ties, or adding buttons and button holes (YUCK! Such a hassle!) and eventually decided I would just add snaps! So, New Years morning, I removed my comforter from its cover and dragged the duvet into the living room.  While watching the replay of the Rose Parade, (There was no way I was getting up in time to watch the original airing) I took my seam ripper and carefully removed the broken zipper.
 
 
Once the zipper was out, it was time to add the snaps.  I grabbed a plank of wood and laid it on my living room floor to provide a stable, solid surface.  I placed a folded up towel on top of that to help muffle the hammering I was about to do, and in an effort to not upset my downstairs neighbors.  I had grabbed a couple packages of metal snaps from JoAnn a while back.  The snaps I use are a 4 part snap, two pieces come together for each side of the snap.


Each side has a piece with "claws" which you position on the outside of whatever fabric item you are attaching it to, and then either a male or female piece goes on the inside of the fabric on top of the claws and the are carefully hammered together.  The hammering causes the "claws" to bend up and inside of the non-clawed end and fastens the pieces together. I recommend purchasing the "snap assembly tool" they make as well. (Also available at JoAnn)


The snap instructions say that you can use a spook of thread, which I have also done in the past, but I find that the tool makes for a bit more accuracy and less chance of missing your target and messing up a few snaps before you get it right.


I wanted my snaps to be relatively uniformly spaced, so I started out placing one on each end and one in the very middle of my space and then just kept placing snaps in the center of those gaps until I was happy with the number of snaps I had and a proper space was left between the snaps.  I also did all of the male snap sides along one half of my opening first and then one at a time lined up the other side and placed a female snap half aligned with the male half on the opposite side. That way I ensured that each snap had a corresponding male and female half at the appropriate place on the strip of fabric. I chose snaps with a white outer surface as well so that they would be less noticeable on the finished product.

 
(PLEASE ignore my wrinkles! I had not yet let Downey wrinkle releaser work its magic on this baby! haha)  All in all it was a really simple and straightforward project.  In fact, I'm really not sure why I put it off for so long.


For any of you out there admiring my lovely bed, stay tuned! Someday soon I will share with you the story of a great friend and creative counterpart and how we built me a bed! That's right, we made that bed with our own hands! :)
 
Happy New Year everyone! May this year bring you many smiles and beautiful moments and memories shared with friends, family and loved ones!

Friday, January 24, 2014

Mastering the art of French Macarons


About a year ago, my friend Kim and I got into a discussion at work about baking.  Kim is an absolutely fabulous baker and from time to time will share with us the fruits of her labors. Everything from home-made marshmallows to chocolate dipped coconut macaroons! I have never even been slightly disappointed in any of her wonderful treats! She is my go-to for baking questions and she is even the one who taught me to make cake pops. During our discussion, the topic came up of the illustrious French Macaron.  Neither of us had ever attempted them before but both thought they were so lovely and decided we needed to take the plunge and give them a whirl. After ordering a couple of cookbooks, and a year later, we finally set a date! Summoning our innermost Julia Child, and armed with tips and recipes, we dove in!

For those of you perhaps not familiar with French Macarons, they are virtually nothing like their distant cousin the coconut macaroon.  French Macarons (use your best french accent on that pronunciation) are a much more fickle beast made with Almond flour, egg whites (where the fickle part comes in) and confectioners sugar. My very first tip for ease in macaron making is to buy Almond flour!! We started with almonds and ground them our self, since almond flour was MIA in the grocery store. Its a lengthy process of blending and sifting and sifting some more, all the while trying NOT to accidentally make Almond butter. So do yourself a favor, and just hunt down some almond flour!


(See how much fun it is sifting home made almond flour...)


After grinding and sifting our Almond flour, we mixed in the confectioners sugar and then  sifted it all again. Then, setting that aside, we began prepping the eggs.  Kim taught me a wonderful trick to getting room temperature eggs (very important in Macaron making) Carefully submerge your eggs in very warm water for five minutes and they are ready to go. Brilliant! Kim also helped me separate (successfully) my first egg without using an actual separator!


Next, we whipped the eggs into stiff peaks (adding food coloring if desired)


Then, we carefully folded in the almond flour/sugar mixture.
 
 
Once fully integrated, we filled a pipping bag with the mixture and pipped 1-inch rounds onto a silpat lined cookie sheet. (Eventually we found that parchment paper works WAY better)


We thought at this point, that something might be wrong, as our circles were very puffy and didn't seem to "settle" and look like the pictures in the recipe book. But, having never made them before, we pressed on.  Our recipe told us to set them out for an hour to let a "crust" form before baking so that classic "feet" ("feet" are the sort of fluffy base that are indicative of the perfect french macaron) would form when they baked.  Once they were done forming their "crusts", we baked them.....they did not get feet.  :(
 

While these were baking, we made the most divine french butter cream, for the fillings, using the egg yolks we had discarded earlier. We made a simple syrup and then blended that into the whipped egg yolks and added our desired flavorings.


Our first attempt, did not exactly look like text book French Macarons....


Although, there were no problems in the flavor department. Our Chocolate Macaron with chocolate ganache filling was fantastic! Our Orange-Vanilla Macaron was quite pleasant and our Lemon-Lavender ones were so DIVINE they gave us chills....SERIOUSLY! None the less, we went home slightly disappointed in our macarons with less than amazing curb appeal.....
 
Later that evening, I got a text from Kim saying that she had found a YouTube video for "Foolproof Macarons" and had followed her advice/recipe and....VOILA! Bravo Kim!!
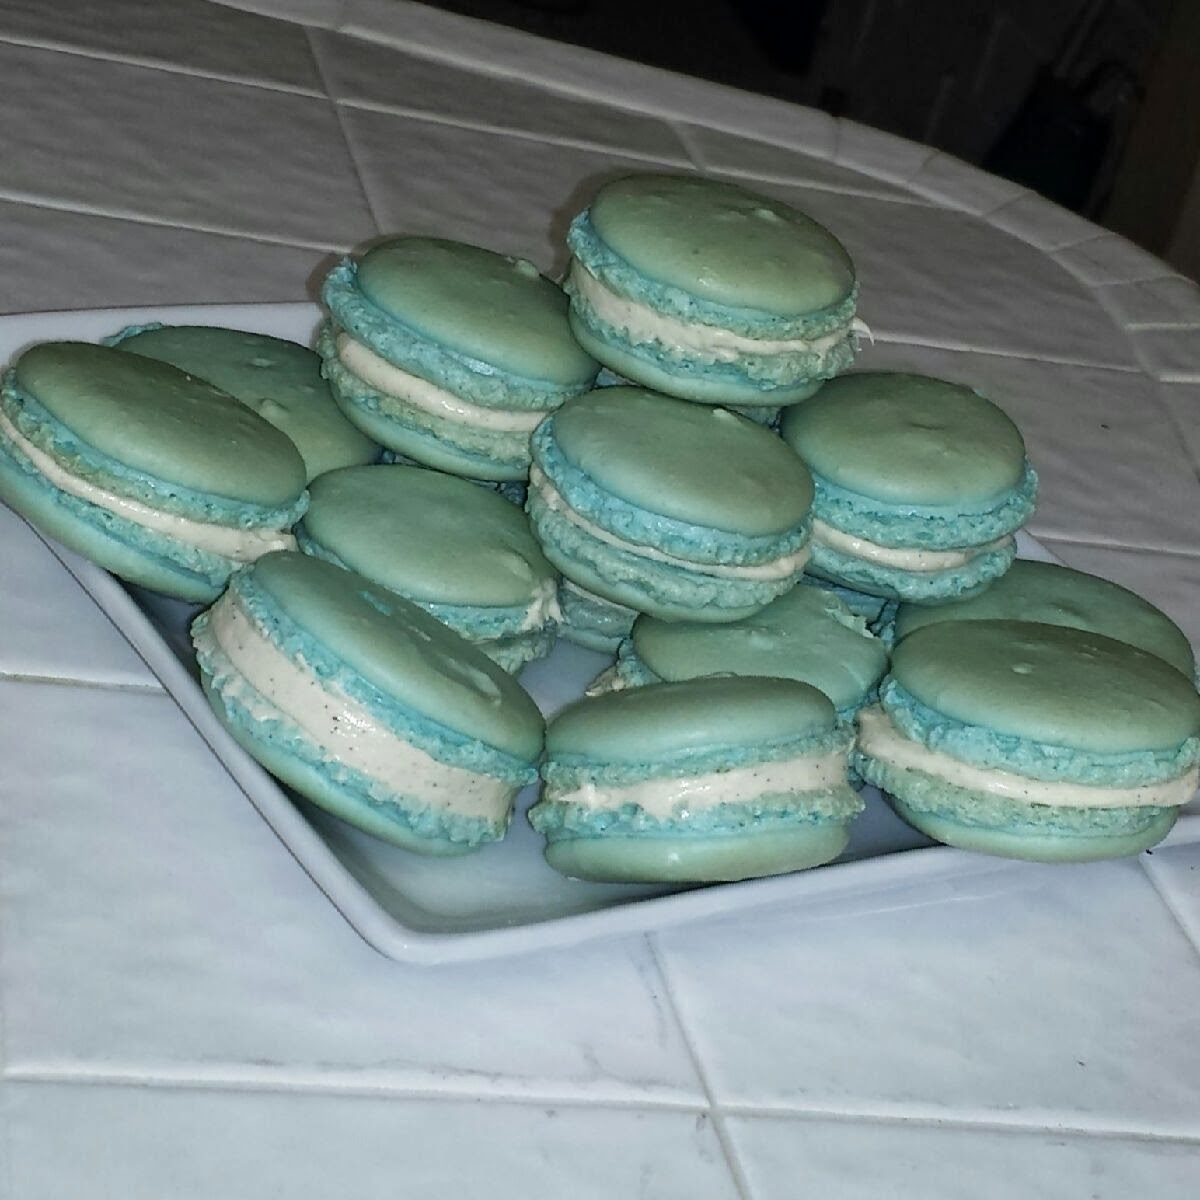


I was soooooooo excited!!! I was determined to try them myself again as well and myself some perfect Macarons as well. The next day, I watched the video and got started.  My first batch following her tips was not perfect, but I could see the beginings of feet and I had enough almond flour left for two more batches.


This lady's best tip was that when mixing the almond flour into your stiffened egg whites, fold them in until your mixture is a "molten" consistency (watch the video for a great visual measure) and it drips off your spatula as you would expect molten lava to flow.  I thought I had possibly over-folded the last batch so I was very careful on the next batch.  Once it had gotten to the molten consistency, I pipped my circles and waited her recommended 30 minutes.


After the 30 minutes was up, I popped them in the oven and waited with baited breath...I was almost afraid to check on them, but was elated when halfway through their bake time, THEY HAD FEET!!!
 
 
I was so excited that I didn't even care that a few of them had cracked on the top. They had feet and were mostly smooth, so I was thrilled! I went ahead and made the third batch and they turned out pretty good as well.


For those of you still reading (sorry, Mastering French Macarons took a while) I have come away from this adventure with a few thoughts....
#1-Macarons are finicky as heck so just go in with a "practice makes perfect" mentality.
#2-I really DO think that ANYONE can perfect these really classy cookies.
#3- Watch the YouTube link prior to making these! The video is SUPER helpful and her tips really do work!
And finally #4- Get almond flour! It's worth it!
 
Kim and I really did have a blast making these and having 2 baking brains working out the kinks together and separately really did help. Bottom line, these really are yummy and fancy little treats and I hope you will give them a try. The possibilities with colors and flavors really are endless and I can't wait to make more! And in closing, borrowing the sign off of my inspiration during this project.....BON APETITE!

Saturday, January 18, 2014

Just like Mommy's!

It was Christmas in January for part of my family this week. We like to keep the holiday going as long as possible....Haha just kidding! Between people passing around the flu/colds during actual Christmas and trying to coordinate 3 people's work schedules with Doctor's appointments etc, we finally found a day that worked. I am sure my nieces did not mind another Christmas one bit from the looks on their faces as people showed up with bags filled with presents.

While planning for this years gifts, I thought I would try out a sort of prototype for an item I had been considering making for my Etsy shop.  My brother and sister-in-law love customized their mesh tote bag and use it as their "diaper bag" for their toddlers.


The thought occurred to me that my nieces might enjoy a tote bag as well, but perhaps one that was more size appropriate.  Thus began my scheming....

I took my regular sized tote bag pattern and brought all the measurements down a few inches.  I wanted it to still be big enough that they could carry toys or books in them, but not so big that it would be super hard to carry.  Once I was satisfied with my measurements, I set out to find the perfect fabrics. For Eva, I found these super cute coordinating Minnie Mouse fabrics!


Eva has been a Minnie Mouse fan from a very young age and I thought she would really like these on her very own bag.  For Audrey, I decided to make use of some adorable Riley Blake fabric I purchased from a fellow Etsy shop during a sale a while back.


I had no idea ,at the time I purchased it, what I would use it for. It was just so darn cute! I couldn't resist, and I was pretty confident that Audrey would enjoy a princess bag.


Our Christmas in January was quite a big day for my brother's family.  Their family dog had broken his leg the day before and the no one, I'm sure, got very much sleep the day before. Audrey fell asleep and had an inpromptu nap while we waited for some of the family to arrive.  Eva, therefore, got her own personal audience while she opened her presents.  She was all to eager to model her "Just my size" tote bag for the room.


She seemed pretty excited too when she told her Mom "I can fit my lunch in here!" Equally exciting was when she realized she could probably fit her Veterinarian doll set ,from my boyfriend, inside the bag!


My poor boyfriend got the wonderful privilege of opening up said doll set for her. MAN! That thing was packed more securely than Barbie dolls! I'm surprised he didn't have to bust out the pocket knife like my Dad used to have to with all the sewn on plastic and twist ties on those things! None the less, I think he was pretty happy she enjoyed the gift. 
 
Audrey finally awoke from her nap shortly after Eva was done with her unwrapping, only for Eva to fall asleep herself.  So Audrey got her own, somewhat groggy, Christmas present opening session.  She seemed somewhat interested in her tote bag and sleepily let me take just this one picture of her modelling her bag while still barely keeping the sleep from her sweet little eyes on Daddy's lap.


She was so cute and sweet opening all of her gifts and was sure to thank everyone after each gift. This kid has some amazing manners! All in all, it was a very nice Christmas.....even if it was in January. It was a little hard for me to tell, with all the sleepiness, if the "Just my size" tote bags had been a true hit or not.  That is until the next morning when my brother sent me these pictures....


Both of the girls had grabbed their totes for a trip to the park! I think they like them! Mission accomplished! 


Friday, January 10, 2014

B is for Banana bread


Bananas have always been among my very favorite of fruits.  However, I have always had a slight problem with them, in that they never seem to last long enough for my taste.  My ideal banana is one that has almost all of the green gone but just a little green still lingering.  To me, they taste the best at this point.  Not too sweet, and not too mushy.  I only generally buy bananas at the grocery store if they are fully green.  Even then, I swear they are yellow practically by the time I get home.  Once they get their first freckle, (nothing against freckles ha ha) I won't eat them.  I'm sure my Mom would tell you this strange preference of mine started as a child when I would devour practically the entire bushell before we got home.  I love my barely ripe bananas, what can I say?
 
That being said, I hate to see good food go to waste.  My Mom used this recipe to use up all her overripe bananas and it has been a favorite of mine my entire life.  I almost don't get upset when my bananas go "bad" because I can just wait a bit and they will be ready for this scrumptious recipe!
 
 
Ingredients
 
1/2 cup softened butter
1 1/2 cups sugar
2 eggs
3 large ripe bananas
1/3 cup "sour milk"- (1/3 cup milk mixed w/ 1tsp vinegar)
1tsp baking soda
1tsp vanilla
2 cups flour
1/2 tsp salt
1 tsp baking powder
 
 
To begin with, mix together your softened butter and your sugar in a mixer until fluffy.


Add your eggs one at a time and beat well.
 
 
In a separate mixing bowl, mash your 3 ripe bananas


In a small cup, mix together your "sour milk" and stir that mixture into your mushed bananas.
 
 
Add your mushed banana mixture into your sugar/butter mixture and begin adding the remainder of dry ingredients one at a time until fully mixed.


Grease a bread pan and pour your mixture into it.


Bake for 1 hour at 350 degrees. Place on a cooling rack after baking time is done and enjoy!


This bread is fantastic anytime! Its especially great warm with a little butter on it but is really quite good hot, cold or otherwise. I hope you enjoy one of my favorite childhood treats! My favorite part is the crust, believe it or not. For whatever reason, the crust stays at this wonderful combination of slightly crunchy yet chewy and its sweet and fantastic! I think I will go enjoy another slice right now. Have a great weekend everyone!

Friday, January 3, 2014

2013-Gone in a snap!

Time flies when you're having fun and 2013 has been no exception for me.  This year has breezed right by and it has certainly been a year chalked full of memories and new adventures for me.  This year, I officially opened my very own Etsy shop.  It has been so much fun bringing my bags to life and working with my customers to create unique pieces they will love.  The joy I have found in my Etsy shop has led me to further explore my creative side with the creation of this blog.  Its only been a couple of months now, but it is such excellent motivation to actually push my way through my project list and finding new creative ventures. It has been a pleasure sharing my adventures and wanderings with you all and I look forward to many years to come. 

This New Years' day was sort of my "holiday recuperation day" as I like to call it.  The holidays always feel busy but this particular year seemed extremely busy and stressful for me.  Beings that I actually found myself off of work this year for the holiday, I decided to just relax! Not, however, wanting to be a complete loaf, (Although to be honest I did spend the entire day in pajamas and most of the day on the couch.)I found myself a quick project that I could actually do from the comforts of my living room and allow myself a small sense of accomplishment for the day.  For some time now I have been putting off this project and I'm not sure if I was feeling somewhat New years resolution-ey or what, but I decided it had been put procrastinated enough.

Some time ago (months at least) the zipper on my favorite duvet cover had broken.  I thought it a terrible waste to throw away something I loved so much and that was still perfectly functional in every other aspect.  I decided that I would fix it myself.  I had no idea where one might get a 60 inch zipper and even if I did, zippers are not my favorite thing to work with in general, much less trying to replace a zipper into an already sewn item. I weighed the other options including sewing on ribbon ties, or adding buttons and button holes (YUCK! Such a hassle!) and eventually decided I would just add snaps! So, New Years morning, I removed my comforter from its cover and dragged the duvet into the living room.  While watching the replay of the Rose Parade, (There was no way I was getting up in time to watch the original airing) I took my seam ripper and carefully removed the broken zipper.
 
 
Once the zipper was out, it was time to add the snaps.  I grabbed a plank of wood and laid it on my living room floor to provide a stable, solid surface.  I placed a folded up towel on top of that to help muffle the hammering I was about to do, and in an effort to not upset my downstairs neighbors.  I had grabbed a couple packages of metal snaps from JoAnn a while back.  The snaps I use are a 4 part snap, two pieces come together for each side of the snap.


Each side has a piece with "claws" which you position on the outside of whatever fabric item you are attaching it to, and then either a male or female piece goes on the inside of the fabric on top of the claws and the are carefully hammered together.  The hammering causes the "claws" to bend up and inside of the non-clawed end and fastens the pieces together. I recommend purchasing the "snap assembly tool" they make as well. (Also available at JoAnn)


The snap instructions say that you can use a spook of thread, which I have also done in the past, but I find that the tool makes for a bit more accuracy and less chance of missing your target and messing up a few snaps before you get it right.


I wanted my snaps to be relatively uniformly spaced, so I started out placing one on each end and one in the very middle of my space and then just kept placing snaps in the center of those gaps until I was happy with the number of snaps I had and a proper space was left between the snaps.  I also did all of the male snap sides along one half of my opening first and then one at a time lined up the other side and placed a female snap half aligned with the male half on the opposite side. That way I ensured that each snap had a corresponding male and female half at the appropriate place on the strip of fabric. I chose snaps with a white outer surface as well so that they would be less noticeable on the finished product.

 
(PLEASE ignore my wrinkles! I had not yet let Downey wrinkle releaser work its magic on this baby! haha)  All in all it was a really simple and straightforward project.  In fact, I'm really not sure why I put it off for so long.


For any of you out there admiring my lovely bed, stay tuned! Someday soon I will share with you the story of a great friend and creative counterpart and how we built me a bed! That's right, we made that bed with our own hands! :)
 
Happy New Year everyone! May this year bring you many smiles and beautiful moments and memories shared with friends, family and loved ones!